
Now, I don’t know about you but I am terrible in taking a hint. If there’s something slimy lurking out of my nose while we’re having dinner with his parents in the restaurant, don’t even try starring at me and rubbing your own nose. I will not get it. You’ll will have to say it, loud and clear: “Remove this thing out of your nose because it’s ruining everybody’s appetite!” And then, most probably, I will know what’s to be done.
So, I can promise you, this will be more than just hints. I will show you how to create a grunge design in Photoshop and deliver a layered .psd file in a way which leaves no room for uncertainties.
Grunge designs were cool, they still are cool and, my guess is, they will remain to be, well, cool. Everybody just loves grunge style. Including me. And you. (I guess. I mean you are reading this so I figured… Ah! It’s because of my sense humor… I see…. nothing to do with design though?! Well, thank you! Cool! :))
Ehm, well, ok. Let’s get back to work (fun) now.
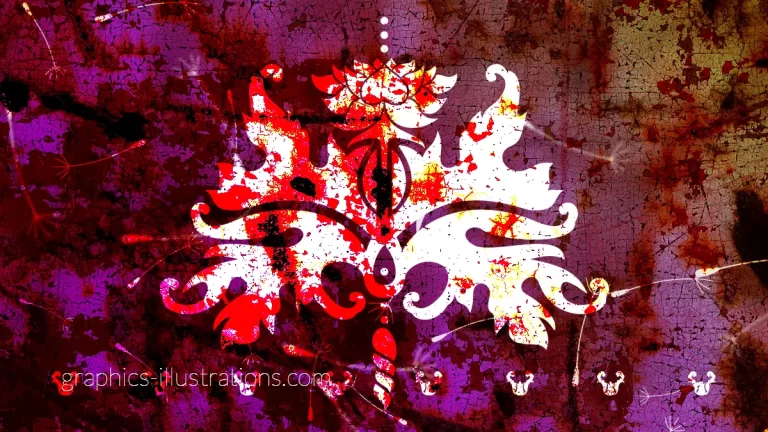
So, here is this image I did. I know, you will not believe, but I was making this image for a different post which was supposed to be about happiness (Yes. Another one.)
![How to Create A Grunge Design in Photoshop [Tips&Hints&More]](https://graphics-illustrations.com/wp-content/uploads/2011/11/grungephotoshoptipshints540.jpg "How to Create A Grunge Design in Photoshop")
And then, after it was finished, with all these “blood-like” stains and “ruined” backgrounds, I started to worry about my perception of happiness because the image was certainly not expressing any of it. But, I liked the design anyways, so I figured, maybe my visitors will want to know how to create grunge designs in Photoshop?!
And … voila!
Here is how it was made, what were the ingredients and what is the recipe:
Photoshop brushes:
1. Damask Photoshop Brushes (34+34+34) + 34 PNGs

– 34 brushes in three sizes – 20 damasks / 14 elements
– 34 transparent PNG files: 20 damasks / 14 elements
– compatible with Photoshop 7.0, CS, CS2, CS3, CS4, CS5 and newer
– compatible with Photoshop Elements 3.0 and newer
– PC/Mac Compatible
– COMMERCIAL LICENSE INCLUDED]
2. Mini set: Dandelions Photoshop brushes (9+9)

– 9+9 Photoshop brushes – two sizes
– compatible with Photoshop 7.0, CS, CS2, CS3, CS4, CS5 and newer versions
– compatible with Photoshop Elements 3.0 and newer versions
– PC/Mac Compatible
– COMMERCIAL LICENSE INCLUDED
Fonts (now, these are not grunge fonts, but I figured they still fit):
1. Gill Sans MT (you can download it at FontZone)
Textures and other ingredients:
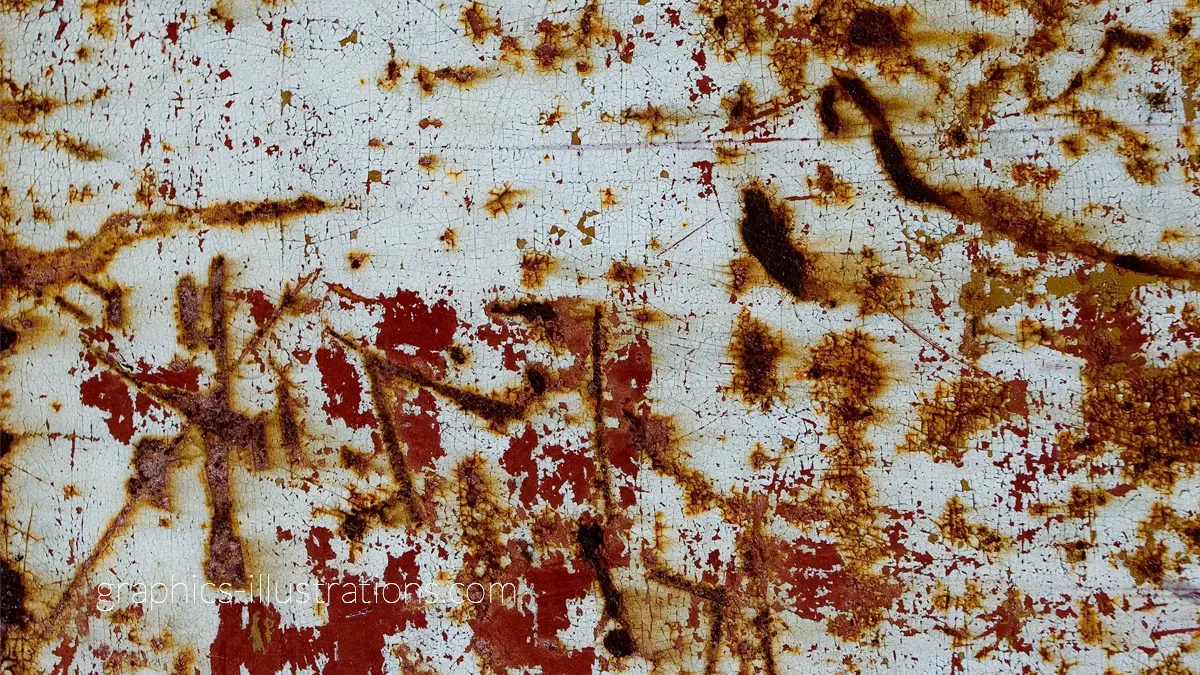
1. Metal Photoshop texture (by me) – download free Photoshop metal texture here (10,3Mb zipped JPG file, 14,6×9,7 inches @240 dpi – print ready!)
CREATING GRUNGE DESIGN – TUTORIAL
(1) Color background layer into the dark dark grey (#050505)
(2) Add a new layer on top the dark grey layer and use gradient color. Let’s say from pink to orange. Make sure that this layer is set to 81% opacity.

(3) Add the metal texture (from this tutorial) above those two layers, and change the style to “Vivid Light” style.
![How to Create A Grunge Design in Photoshop [Tips&Hints&More]](https://graphics-illustrations.com/wp-content/uploads/2011/11/vivid.jpg "How to Create A Grunge Design in Photoshop [Tips&Hints&More]")
(4) Copy the metal texture layer, flip it vertically and select “Multiply” layer style and 71% opacity. Much better.
(5) Go to Filter -> Blur -> Gaussian Blur and set to blur on 3.6 pixels. OK. That’s it.
![How to Create A Grunge Design in Photoshop [Tips&Hints&More]](https://graphics-illustrations.com/wp-content/uploads/2011/11/blured.jpg "How to Create A Grunge Design in Photoshop [Tips&Hints&More]")
(6) Copy the original metal texture layer, flip it vertically and horizontally, make it “Multiply” layer style.
![How to Create A Grunge Design in Photoshop [Tips&Hints&More]](https://graphics-illustrations.com/wp-content/uploads/2011/11/multiply.jpg "How to Create A Grunge Design in Photoshop [Tips&Hints&More]")
(7) Add another folder in “Layers” toolbox and change the folder preference to “Color Dodge”
(8) Add layers with “Damask” Photoshop brushes and “Dandelions” Photoshop brushes (make them white) into the folder from (7) Now, on your screen, you should have something like this:
![How to Create A Grunge Design in Photoshop [Tips&Hints&More]](https://graphics-illustrations.com/wp-content/uploads/2011/11/colordodge.jpg "How to Create A Grunge Design in Photoshop [Tips&Hints&More]")
So, the graphic is pretty much done. Actually, it’s done. Finally we can add some text using Gill Sans MT font.
And voila! Ta-taaaa!
Of course, you are free to download the layered PSD file, see for yourself what effects were applied and how, play with it and create something completely different and new!
[Download Grunge Design Layered PSD File] – zipped 65Mb, 8×8 inches @300 dpi – print ready!
OK. I hope you found this post/tutorial useful. As always, if you have any questions feel free to ask me here or on our Graphics-Illustrations.Com Facebook Page
Love, peace and happiness everyone! If you create something with a little help of this tutorial, post it on Graphics-Illustrations.Com Facebook page. There are 5700+ graphic artists, professionals and enthusiasts there, you might wanna show off a bit :))
xoxoxo
Sil


Grunge is a great word. Your directions are very good and perhaps I will give it a try. thanks