
Wrapping scrolls around illustrations or images are quite popular designers little trick these days. I’ll show you how to draw a scroll “easy way”.
Step 1
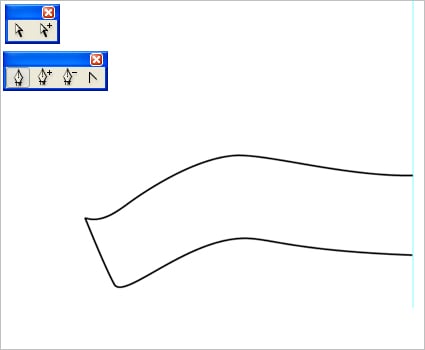
Assuming that you know how the scroll (banner) looks like, draw just one half of it (start left or right from the center). I am using the Wacom tablet and usually I use the “Pen tool”, but I think that drawing with the “Path tool” is easier for those of you who use a mouse.

Step 2
You can modify the shape as you wish, just keep in mind that you have to draw a folded part on the side.
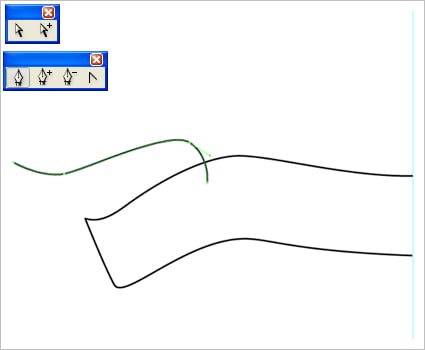
Step 3
Now draw the folded part, which will “fly on the wind”.
Step 4
The folded part of the banner must be placed just bellow the main part, now you have to follow the path between the main part and the folded part and draw another folded part between them.

Step 5
That connection should look like this:

Step 6
Now copy+paste these three parts, and mirror them horizontally. Join middle anchors and the banner is finished. Color them as you wish. Add some cracks and you’ll get the “old-world” style.

While you’re here, perhaps you’d fancy taking a peek at these tutorials as well:


very simple tutorial. easy to follow and the results are as expected. thank you.
i like it 🙂 actually i never used them but this will change i think 😉
neat tutorial.strengthens the use of pen tool 🙂 cheers
Nice one…thanks for the useful tip.
yes Sterling, you can use pen tool in Photoshop too.
S
is there a way to do this in photoshop 7.0?
erika 😀
i need help with finding the pencils?
Thanks for the tutorial. This is exactly what I was looking for!
Excellent.
Sorry, doesn’t work.
Every time you try to click a point on a drawn shape Illustrator just removes it. If you try holding shift it just draws a straight line – major pain to try to move lines close together at a max zoom and then group – need to draw precise.
To Rise:
The pen tool is one of the harder tools to master. It takes some time… and just playing with to really get it all down. Play with it some, copy the picture that they give you here, paste it into illustrator on a new layer, lock that layer, make a new layer and draw on top of it, try to match it line for line. This type of thing will strengthen your pen tool skills.
to huff:
try harder. I got mine to work fine.
Not sure how to add the “cracks” you are talking about. Can you explain further?
Amazing.
I have to say I have not touched illustrator before and I have found this tutorial amazing. Thanx so much for taking your time to write it.
All you negative n00bs need to learn to use a mouse and a computer. Maybe it was you that is in error and you should be appreciative that someone has taken teh time to write something.
Thanx Again!!
Thanks! I’m new to Illustrator and found this tutorial very helpful.
Which version of illustrator are you using? I am using CS3 and it tells me that I can only “join” two open paths. In CS5 can you join two “non-open” paths, means can you join one anchor to a different anchor while they are on the path? any help would be great. I have the shapes I want, I just can’t get them to connect properly.
Hi! I used Illustrator CS here. I do not have CS3 or CS5…
hey man, nice blog…really like it and added it to bookmarks. keep up with good work
I really appreciate the step by step banner technique…thanks.
After examine a number of of the weblog posts on your web site now, and I actually like your way of blogging. I bookmarked it to my bookmark website record and will probably be checking again soon. Pls try my website online as well and let me know what you think.